


Mapping a MIDI device
If you're not using a supported MIDI controller, MIDI mapping gives you full control over how your hardware interacts with djay Pro. You can assign every button, knob, and fader to the functions you use most. This flexibility lets you shape djay around your workflow, making your controller feel like a natural extension of your performance.
How to start mapping a MIDI device
- Launch djay Pro.
- Plug your MIDI controller into your computer via a spare USB port and turn it on. If this is the first time using the controller, you'll see a pop-up message asking if you want to configure the device. Click Yes.
- The device MIDI Configuration window will load, displaying the MIDI mapping screen.
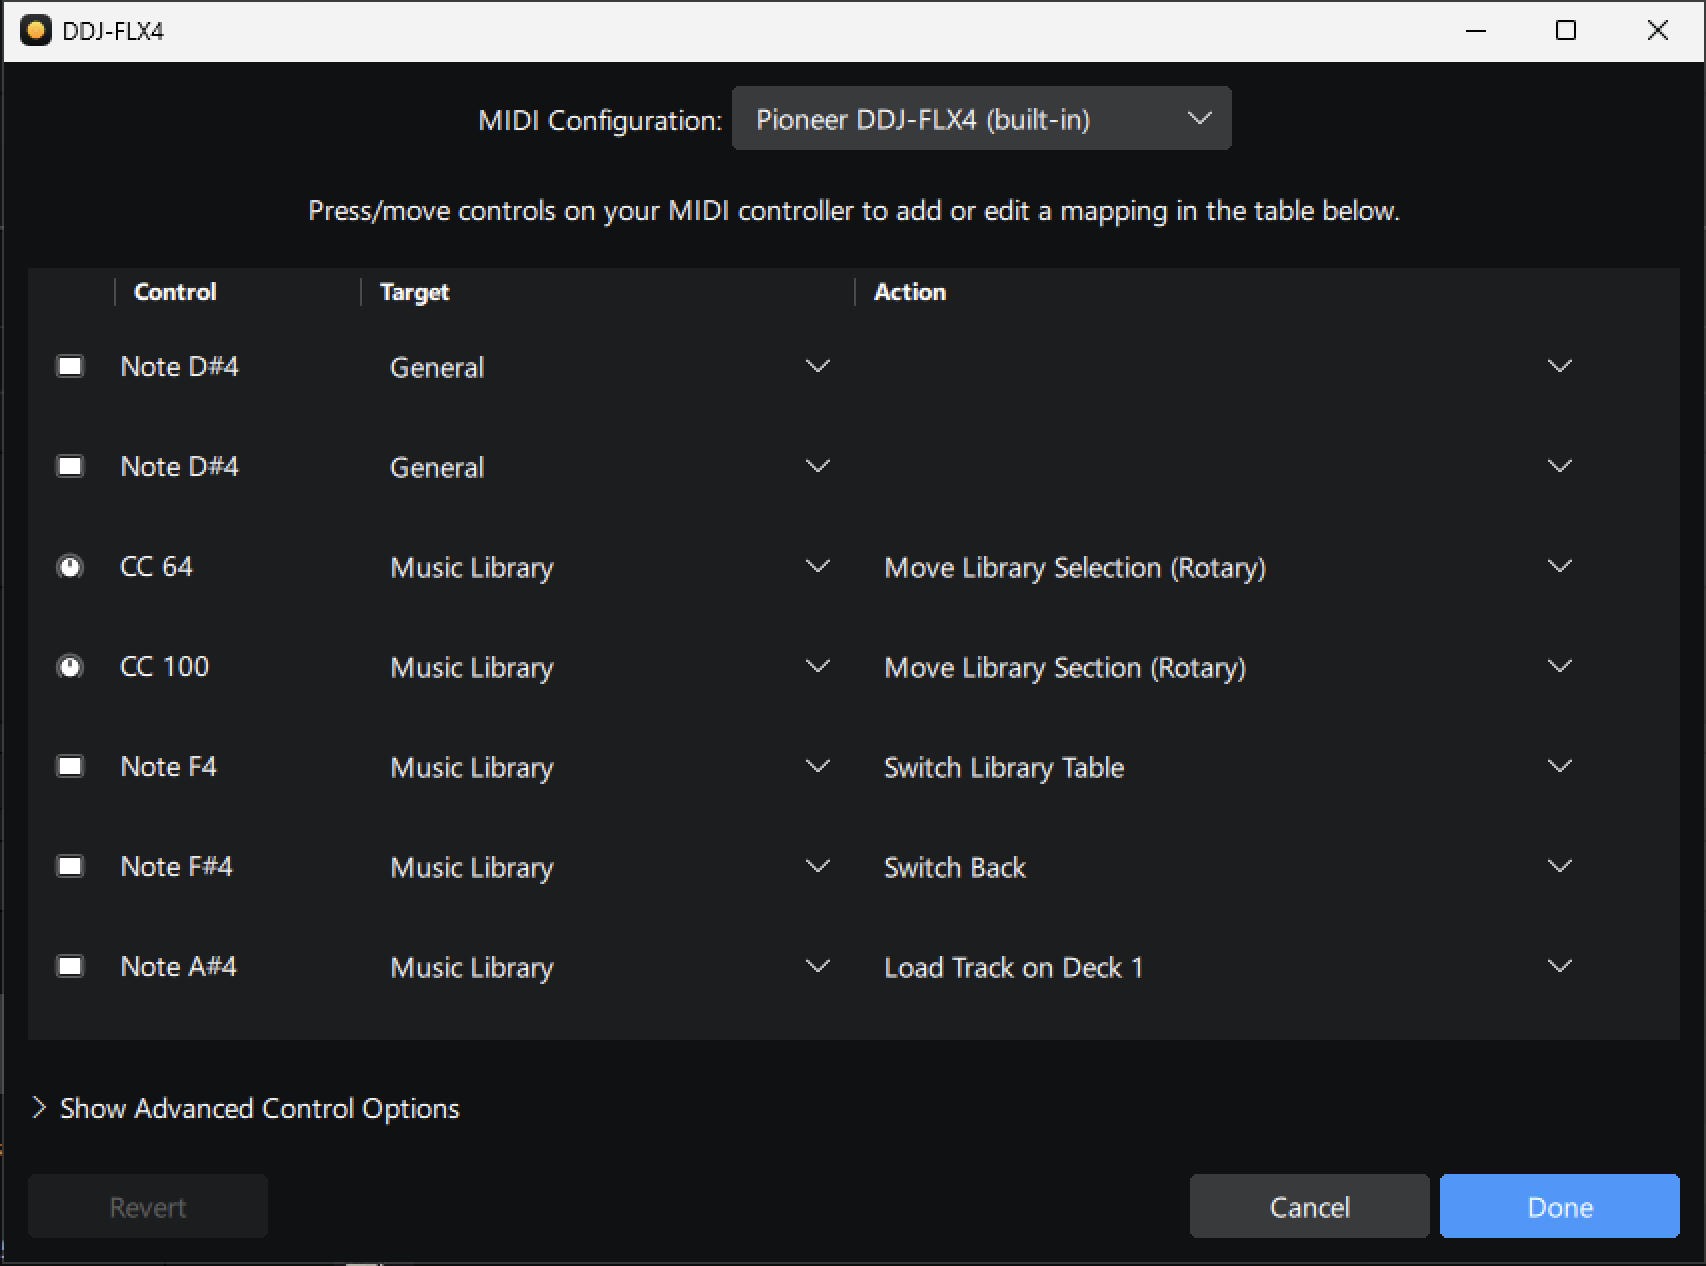
- To start mapping your first MIDI signal, use the desired control (Add rotary, eq, pads) for the editor to pick up the correct note or CC to add to the list. Press a button on your controller to add this to the list.
- Next, you need to assign a Target (the part of djay you want to control) and an Action (what that control should do).

For example, to map the Deck 1 Play button:
- In the Target drop-down, select Deck 1.
- In the Action drop-down, select Play/Pause.
You’ve now mapped the Deck 1 Play button to your controller. Load a track and test it out.
Keep assigning the controls you need. When you're done, click Done to save your configuration.
Testing a new mapping
You can test your custom MIDI mapping right away—no need to save it first. Just use your MIDI controller to try it out.
Saving or reverting a configuration
Click Done to save your custom MIDI configuration. Click Revert to undo any changes and return to the last saved version—or to a blank mapping if you haven’t saved yet.
MIDI control targets
Control Targets help you define which part of djay Pro your MIDI signal will affect. They’re grouped into key areas of the interface, making it easier to find and assign the right commands during mapping.
You can choose from the following target areas:
- Decks 1–4
- Mixer
- Music Library
- Sampler
- Microphone
- General
Once you've selected a target, you can drill down further using the Actions drop-down to assign a specific function within that area.
Advanced options
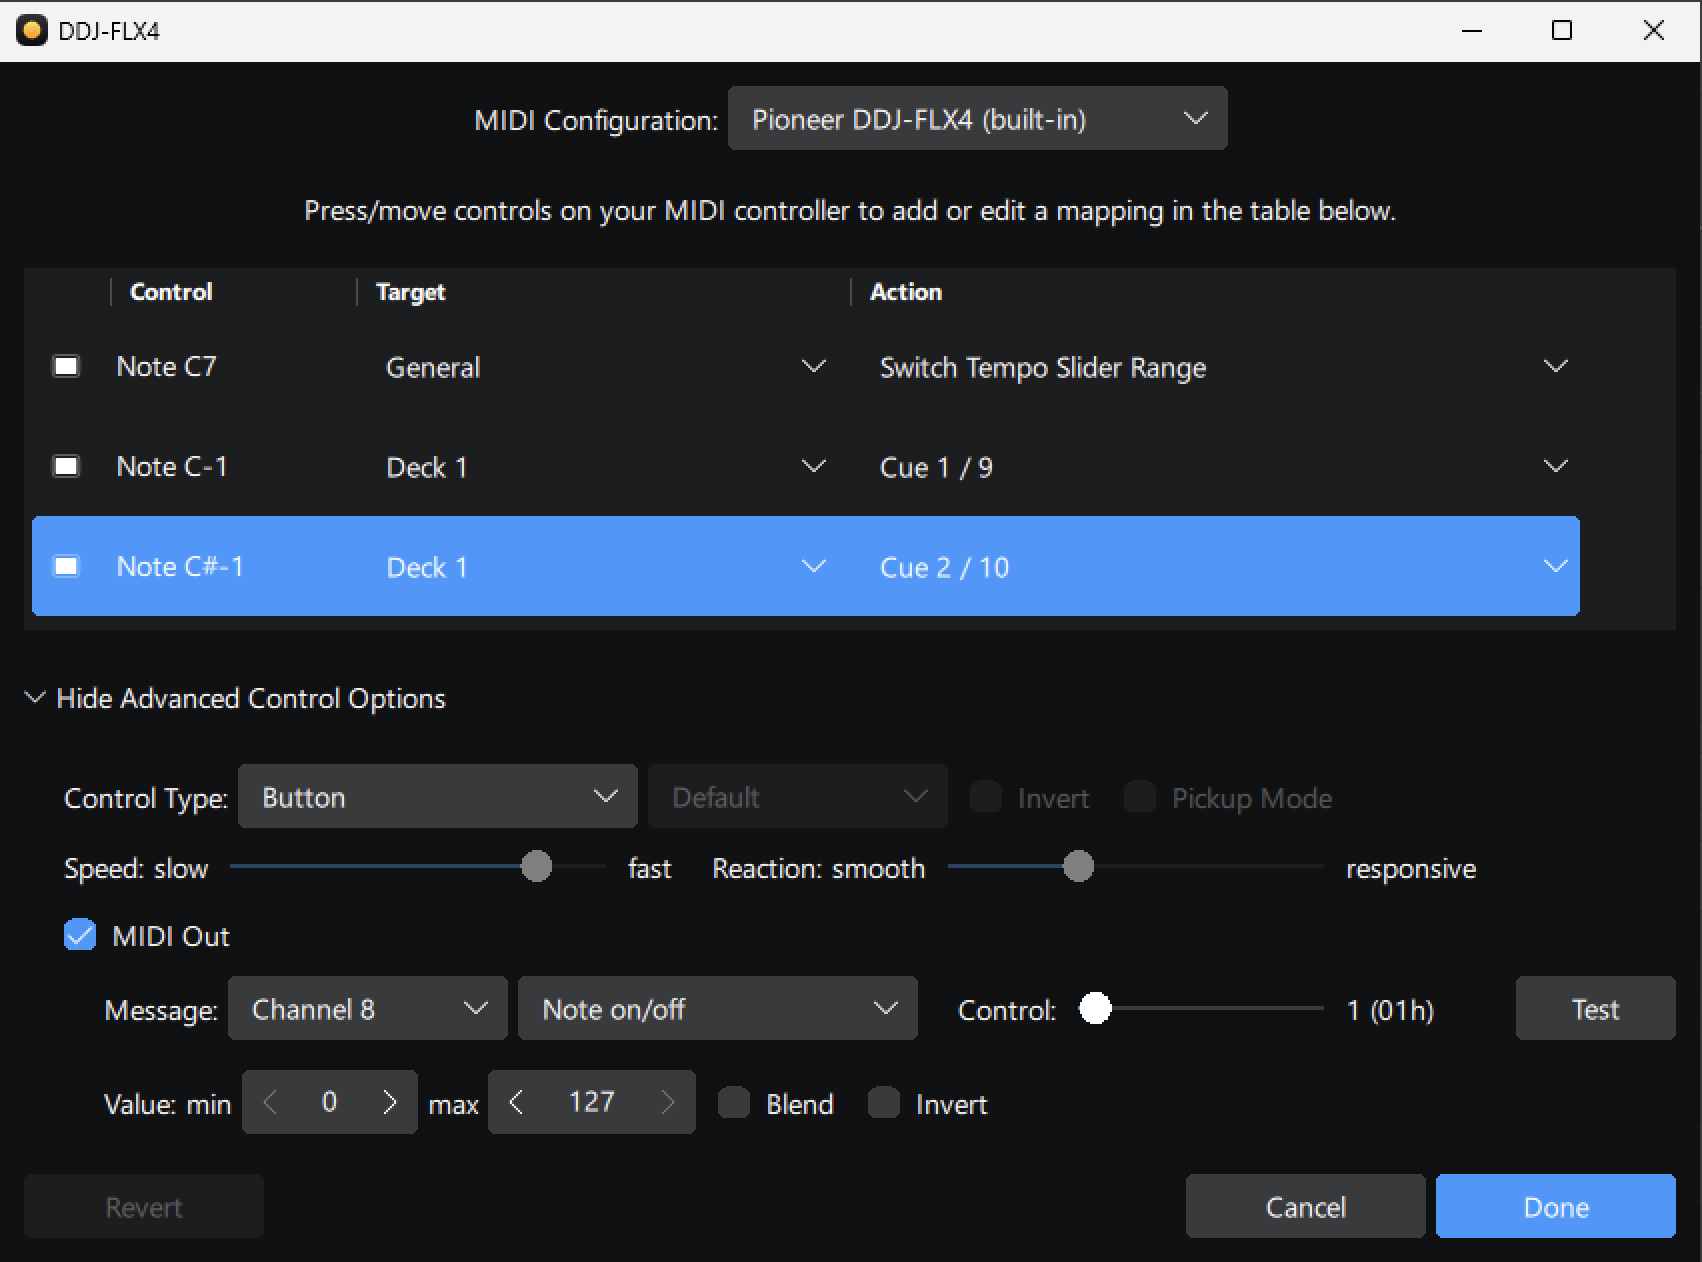
The Advanced Options panel allows you to fine-tune how your MIDI controls behave in djay Pro. These settings are useful if a mapped control doesn’t respond as expected, or if you want to customize how your hardware feels.
-
Control type
Choose the type of physical control you're mapping:- Button
- Fader/Knob
- Rotary (01h/7Fh)
- Rotary (3Fh/41h)
- Rotary (absolute)
The different Rotary control types are for endless rotary controls (encoders) like jog wheels or music library controls. The easiest way to find the right option is to test the control with each option.
-
Invert
Some MIDI controllers send inverted signals for sliders and knobs, causing them to move in the opposite direction in djay Pro. Enabling Invert reverses the signal so the control responds as expected. This is useful if a knob or fader behaves in the opposite way to what you intended. -
Pickup mode
Prevents sudden jumps when using shared controls (like a single fader for multiple decks). djay Pro detects when your MIDI controller is out of sync with the on-screen control and temporarily disables it until you bring them back into alignment. Especially useful for tempo sliders, which can shift when Sync is enabled. -
Speed
Adjusts how fast the control responds to movement, especially useful for endless encoders (e.g., scrolling through the library). -
Reaction
Controls how quickly jog wheels respond:- Smooth settings feel more gradual.
- Responsive settings feel more immediate and tight.
-
MIDI Out
Enables djay Pro to send feedback signals to your controller—like lighting up pads or toggles. This works with hardware that supports LED or visual feedback.For most controllers, simply enabling the MIDI Out checkbox will allow button LEDs to work correctly. For others, you may need to manually select the correct MIDI channel, message type (CC or Note on/off), and control number that corresponds to the button you're mapping.
-
Channel
Sets the MIDI channel the signal is sent on (1–16). Match this with your hardware settings if needed. -
Type
Choose between:- Note On/Off: For buttons or pads.
- Control Change (CC): For knobs, faders, and continuous controls.
-
Control
Specifies which control receives outgoing MIDI messages. This can differ from the mapped control, allowing for more complex feedback setups. -
Value
Set the minimum and maximum values for outgoing MIDI signals (0–127).- Min controls the LED color when the button is not engaged.
- Max controls the LED color when the button is engaged.
You can also adjust the output behavior with these options:
- Blend: Smooths the transition between values.
- Invert: Reverses the MIDI output signal.